Building an Ubuntu service for my Antec Flux Pro
I recently put together a new PC build. It's primarily aimed at machine learning so I wanted to get a case that had really great airflow. I asked around and was directed to a list put together by GamersNexus[1] highlighting their top cases of the year. The only case I was able to find in stock was their "Best Mid-Range Case" of 2024. I've been quite pleased with my purchase. It's big with mostly mesh paneling that allows for great airflow through the case. On the side panel it has display designed to render the CPU and GPU temperatures with a small push button on top to toggle the display on or off.
Unfortunately, getting the temperature display requires the user to install and run their software package[2] which is only available on Windows.
Being an Ubuntu user and not wanting to miss out, I saw this as an opportunity to learn more about their software and build a similar service for my system. I did notice a reddit thread[3] where someone had done similar work so I used their work to validate mine as I explored.
Reverse Engineering
The first step was to download the package
$ curl -O https://www.antec.com/documents/software/iUnity/iUnity_2_1_0_3.msi
Since this was distributed as an *.msi package, I couldn't really work with it directly in Ghidra or other tools. It had to be extracted first. Luckily, the msitools package comes with msiextract which could do the initial extraction.
msiextract iUnity_2_1_0_3.msi
Examining the directory structure provides a lot of insight into how the tool was built
$ tree PFiles64/Antec/iUnity/
PFiles64/Antec/iUnity/
├── chrome_100_percent.pak
├── chrome_200_percent.pak
├── d3dcompiler_47.dll
├── ffmpeg.dll
├── icudtl.dat
├── iunity.exe
├── libEGL.dll
├── libGLESv2.dll
├── LICENSE
├── LICENSES.chromium.html
├── locales
│   ├── af.pak
│   ├── am.pak
│   ├── ...
│   ├── zh-CN.pak
│   └── zh-TW.pak
├── resources
│   └── app
│       ├── node_modules
│       │   ├── debug
│       │   └── electron-squirrel-startup
│       └── package.json
├── resources.pak
├── runtime
│   ├── AntecHardwareMonitorWindowsService.exe
│   └── cpuidsdk64.dll
├── snapshot_blob.bin
├── v8_context_snapshot.bin
├── version
├── vk_swiftshader.dll
├── vk_swiftshader_icd.json
└── vulkan-1.dll

8 directories, 75 files
The presence of electron-squirrel-startup and node_modules more or less confirms that the tool is an Electron application at least on the frontend. We can look at the package.json for more information about the package.
"version": "2.1.0.3",
"author": "Brilltek",
...
"dependencies": {
  "@chakra-ui/react": "^2.8.1",
  "@emotion/react": "^11.11.1",
  "@emotion/styled": "^11.11.0",
  "bufferutil": "^4.0.8",
  "dayjs": "^1.11.10",
  "electron-squirrel-startup": "^1.0.0",
  "flora-colossus": "^2.0.0",
  "framer-motion": "^10.16.4",
  "i18next": "^23.5.1",
  "react": "^18.2.0",
  "react-circular-progressbar": "^2.1.0",
  "react-dom": "^18.2.0",
  "react-i18next": "^13.2.2",
  "react-icons": "^4.11.0",
  "react-router-dom": "^6.15.0",
  "react-tracked": "^1.7.11",
  "typescript": "^5.1.6",
  "utf-8-validate": "^5.0.10",
  "ws": "^8.14.2",
  "zod": "^3.22.2",
  "zustand": "^4.4.1"
}
The package suggests that it was authored by a company called Brilltek whom from my limited googling suggests that they are a consultancy in Taiwan. While it was cool to explore the frontend, what seemed a lot more promising was the AntecHardwareMonitorWindowsService.exe. This is an executable package that I could inspect in Ghidra.

After loading it into a Ghidra project and inspecting for functions, a couple stood out that looked for CPU and GPU metrics that showed I was on the right track. They did also point out that the binary was compiled using .NET so I would need a different tool if I wanted to make more progress[4].
  *************************************************************************
  *                              FUNCTION                               *
  *************************************************************************
  undefined4 __fastcall get_targetGpu(undefined4 param_1, byte
undefined4              EAX:4                 <RETURN>
undefined4              ECX:4                 param_1
byte *                       EDX:4                 param_2
undefined4              Stack[0x4]:4      param_3
undefined4              Stack[0x8]:4      param_4
undefined2              Stack[0xc]:2      param_5
  .NET CLR Managed Code
  get_targetGpu
004038ed  02 7b 43 02         db[7]
00 04 2a
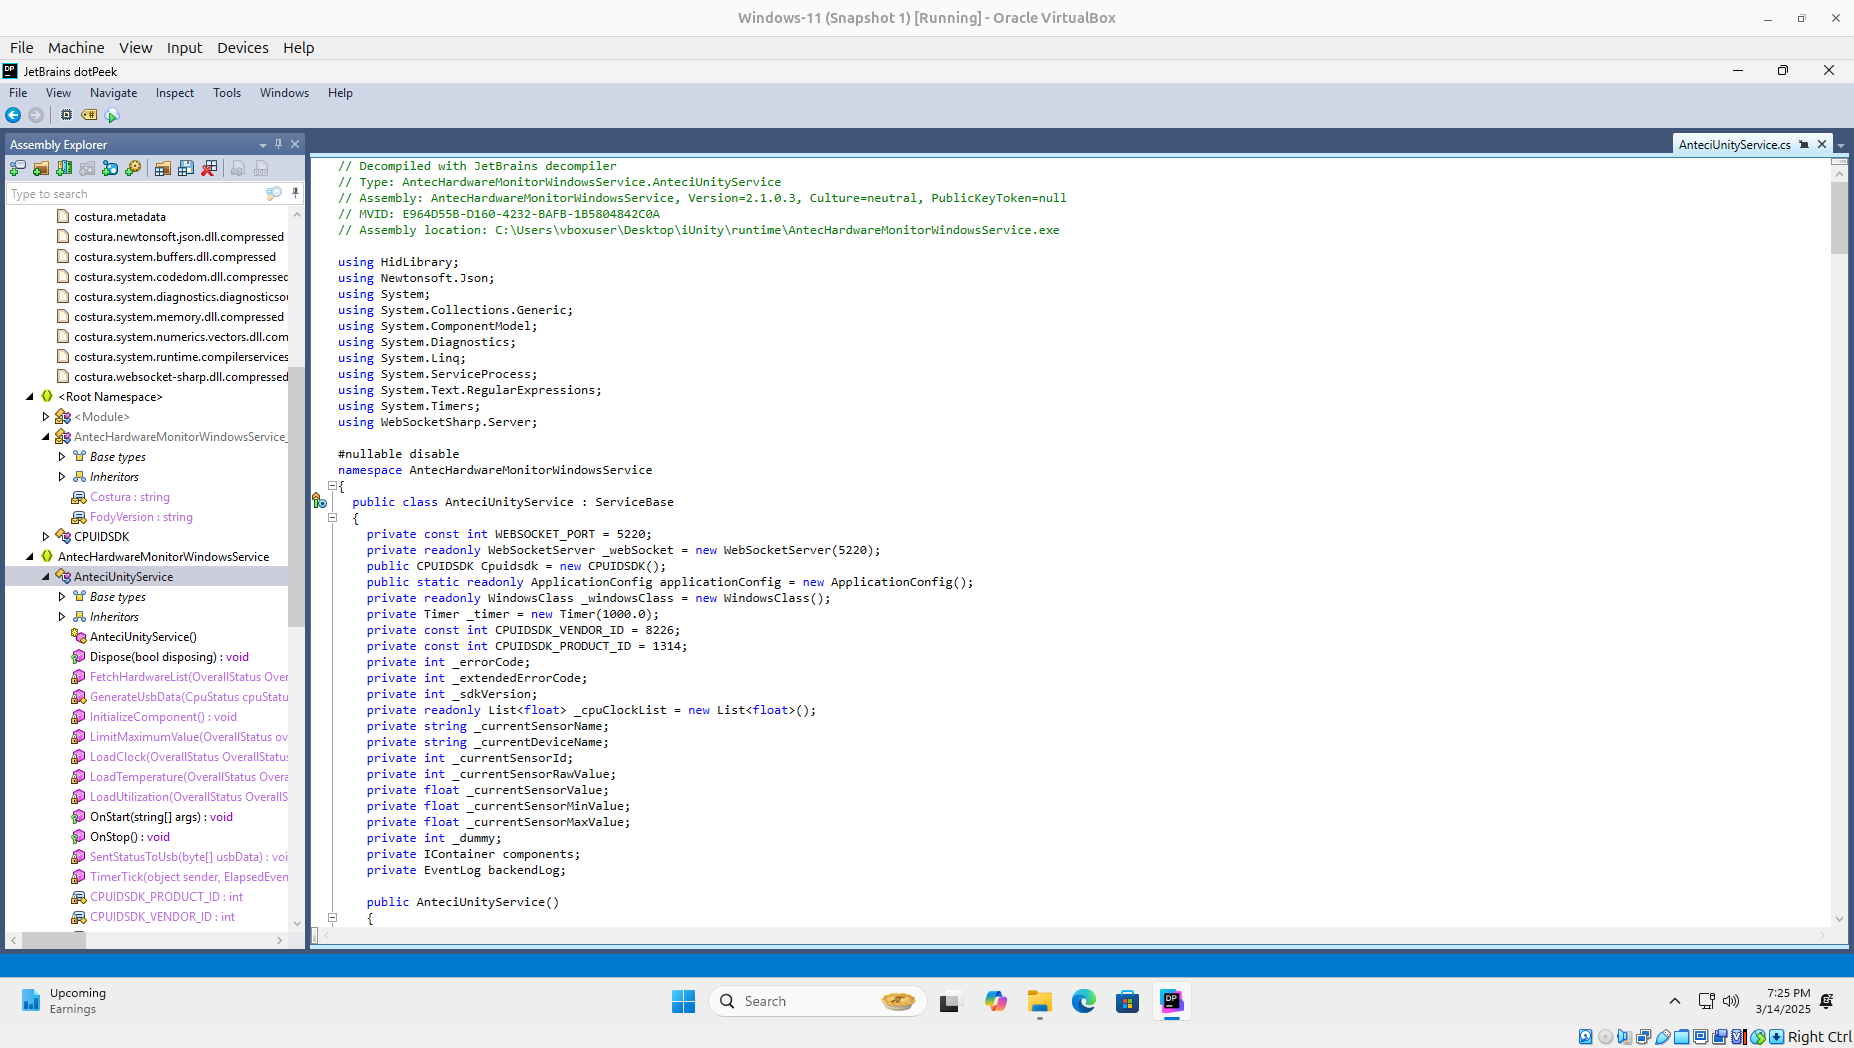
I selected dotPeek[5] as my tool of choice and loaded up the binary in a Windows VM. Importing the binary into dotPeek was quite straight forward.
The AnteciUnityService class. Seemeed to have most of the business logic that powered the application. Looking through the imports, the HidDevices class stood out indicating that the display was communicated with over USB.
Looking at where HidDevices was used, provided a lot more insight into the USB implementation.
private void SentStatusToUsb(byte[] usbData)
{
  try
  {
    HidDevice hidDevice = HidDevices.Enumerate(8226, new int[1]
    {
      1314
    }).FirstOrDefault<HidDevice>();
    if (hidDevice == null)
      return;
    hidDevice.OpenDevice();
    hidDevice.Write(usbData);
    hidDevice.CloseDevice();
  }
  catch (Exception ex)
  {
    Console.WriteLine("Error while sending data to USB device");
  }
}
The 8226 (2022 in hex) and 1314 (0522 in hex) values suggested that these were the Vendor and Product ID values of the sensor which I could validate with lsudb.
$ lsusb
...
Bus 003 Device 006: ID 2022:0522 Љ Љ
...
Success! I now sure i'm on the right path. Now I just need to know how the packet being sent over USB is constructed.
private static byte[] GenerateUsbData(CpuStatus cpuStatus, GpuStatus gpuStatus)
{
  byte[] source = new byte[13];
  source[0] = (byte) 0;
  source[1] = (byte) 85;
  source[2] = (byte) 170;
  source[3] = (byte) 1;
  source[4] = (byte) 1;
  source[5] = (byte) 6;
  if ((cpuStatus != null ? (double) cpuStatus.Temperature : 0.0) == 0.0)
  {
    source[6] = (byte) 238;
    source[7] = (byte) 238;
    source[8] = (byte) 238;
  }
  else
  {
    string str = cpuStatus.Temperature.ToString("00.0");
    source[6] = Convert.ToByte(int.Parse(str[0].ToString()));
    source[7] = Convert.ToByte(int.Parse(str[1].ToString()));
    source[8] = Convert.ToByte(int.Parse(str[3].ToString()));
  }
  if ((gpuStatus != null ? (double) gpuStatus.Temperature : 0.0) == 0.0)
  {
    source[9] = (byte) 238;
    source[10] = (byte) 238;
    source[11] = (byte) 238;
  }
  else
  {
    string str = gpuStatus.Temperature.ToString("00.0");
    source[9] = Convert.ToByte(int.Parse(str[0].ToString()));
    source[10] = Convert.ToByte(int.Parse(str[1].ToString()));
    source[11] = Convert.ToByte(int.Parse(str[3].ToString()));
  }
  int num = ((IEnumerable<byte>) source).Sum<byte>((Func<byte, int>) (b => (int) b)) % 256;
  source[12] = Convert.ToByte(num);
  return source;
}
It looks like they construct a 13 byte array with a 6 byte header. They also go on encode each digit of the temperature before going on to compute a checksum.
Rewriting in Rust
At this point I had all the information I needed to build my port. I decided to do this in Rust, using the cargo deb package which can help construct a debian package which I can conveniently install with apt.
fn open_usb_device() -> rusb::DeviceHandle<rusb::GlobalContext> {
    match rusb::open_device_with_vid_pid(VENDOR_ID, PRODUCT_ID) {
To get the CPU and GPU temperatures, I used the systemstat and nvml_wrapper crates
fn get_cpu_temp() -> f32 {
    let sys = System::new();
    match sys.cpu_temp() {
        Ok(temp) => temp,
        Err(e) => {
            eprintln!("Error getting CPU temp: {}", e);
            std::process::exit(1);
        }
    }
}

fn get_gpu_temp(gpu: &AvailableGpu) -> f32 {
    match gpu {
        AvailableGpu::Nvidia(nvml) => {
            let device = nvml.device_by_index(0).unwrap();
            match device.temperature(TemperatureSensor::Gpu) {
                Ok(temp) => temp as f32,
                Err(e) => {
                    eprintln!("Error getting GPU temp: {}", e);
                    0.0
                }
            }
        }
        AvailableGpu::Unknown => 0.0,
    }
}
For the formatting logic, we follow the pattern that we discovered in the service executable. Interestingly in my testing, making a 13 byte array didn't work, however removing the leading 0 byte fixed the issue. I assume their HidDevices removes the value before transmitting.
fn encode_temperature(temp: f32, payload: &mut Vec<u8>) {
    let ones = (temp / 10.0) as u8;
    let tens = (temp % 10.0) as u8;
    let tenths = ((temp * 10.0) % 10.0) as u8;

    payload.push(ones);
    payload.push(tens);
    payload.push(tenths);
}

fn generate_payload(cpu_temp: f32, gpu_temp: f32) -> Vec<u8> {
    let mut payload = Vec::<u8>::new();
    payload.push(85);
    payload.push(170);
    payload.push(1);
    payload.push(1);
    payload.push(6);

    encode_temperature(cpu_temp, &mut payload);
    encode_temperature(gpu_temp, &mut payload);

    let checksum = payload.iter().fold(0u8, |acc, e| acc.wrapping_add(*e));
    payload.push(checksum);
    payload
}
Finally to have this program run as a service we have to include metadata to copy the binary as well as manifests for the systemd service.
# Cargo.toml

[package.metadata.deb]
maintainer = "Nish Tahir <nishtahir@outlook.com>"
copyright = "2024, Nish Tahir <nishtahir@outlook.com>"
license-file = ["LICENSE", "4"]
depends = "$auto"
section = "utility"
priority = "optional"
assets = [
    ["target/release/af-pro-display", "usr/bin/", "755"],
    ["packaging/udev/99-af-pro-display.rules", "lib/udev/rules.d/", "644"],
    ["packaging/systemd/af-pro-display.service", "lib/systemd/system/", "644"],
]
conf-files = [
    "/lib/udev/rules.d/99-af-pro-display.rules",
    "/lib/systemd/system/af-pro-display.service"
]
maintainer-scripts = "packaging/debian/"
Next we include a post install script to update the user's permissions and start the service
# Reload udev rules
udevadm control --reload-rules || true
udevadm trigger || true

# Add plugdev group if it doesn't exist
getent group plugdev >/dev/null || groupadd -r plugdev

# Add all users in sudo group to plugdev group
for user in $(getent group sudo | cut -d: -f4 | tr ',' ' '); do
    usermod -a -G plugdev "$user" || true
done

# Reload systemd
systemctl daemon-reload || true

# Enable and start service on fresh install
if [ "$1" = "configure" ]; then
    systemctl enable af-pro-display.service || true
    systemctl start af-pro-display.service || true
fi
We want to be good citizens so we need to add a prerm script to stop the service and postrm script to remove permissions during uninstallation.
# ---- prerm ----

# Stop service before removal
if [ -d /run/systemd/system ] && [ "$1" = remove ]; then
    systemctl stop af-pro-display.service || true
    systemctl disable af-pro-display.service || true
fi

# ---- postrm ----
if [ "$1" = "purge" ]; then
    rm -f /lib/udev/rules.d/99-af-pro-display.rules
fi

# Reload systemd daemon
systemctl daemon-reload || true
Conclusion
Overall this took me about a day to put together and it was a lot of fun building out functionality for myself to use. I think I ended up with something a lot lighter weight than what the manufacturer offers to their users. There's still room for improvement, a few that come to mind include:
- Supporting AMD and Intel GPUs
- An option to select which GPU in multi GPU setups
- Packaging the binary for other Linux OSes and perhaps even windows
However for now it works for my usecase so maybe it's good enough. If you'd like to use it yourself or make a contribution, the package is available here.
(no date) Best PC cases of 2024: $80 to $800 airflow, Cable Management, & thermal leaders. gamersnexus.net. Available at: https://gamersnexus.net/cases/best-pc-cases-2024-80-800-airflow-cable-management-thermal-leaders (Accessed: 2025-3-15) ↩︎
There really isn't a support page for this that I could find. The software package is really only mentioned on the product page and manual. ↩︎
PrismNexus (no date) Got the Antec Flux Pro temperature display working on Linux. www.reddit.com. Available at: https://www.reddit.com/r/Antec_Official/comments/1i6akyi/comment/me9t89a/ (Accessed: 2025-3-15). ↩︎
White, T. (2023) Intro to .NET reverse engineering - Tristan white. medium.com. Available at: https://medium.com/@tr15t4n/intro-to-net-reverse-engineering-c54823b22d6f (Accessed: 2025-3-15). ↩︎
(no date) DotPeek: Free .NET decompiler & assembly browser by. www.jetbrains.com. Available at: https://www.jetbrains.com/decompiler/ (Accessed: 2025-3-15). ↩︎